The Ultimate Oreo Fudge Ice Cream Bars (Easy No-Bake Recipe!)
Create the ultimate Oreo fudge ice cream bars at home with this easy, no-churn recipe! With a crunchy crust, creamy filling, and rich fudge topping, this impressive no bake dessert recipe is a guaranteed family favorite.
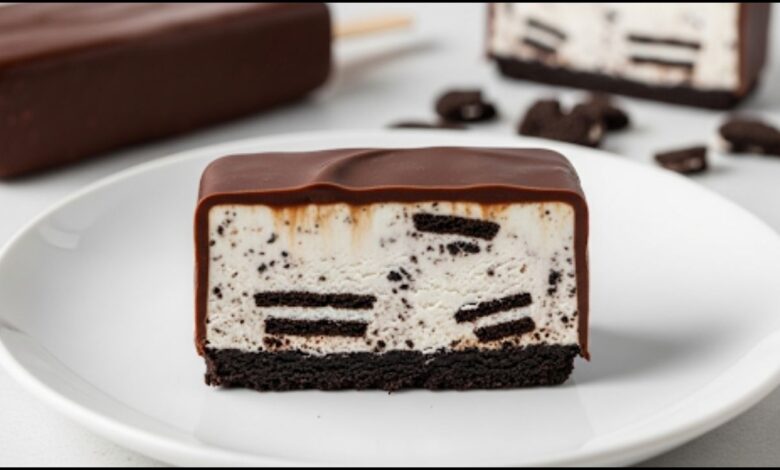
Do you remember hearing the faint, cheerful music of the ice cream truck on a hot summer day? That sound sent us kids scrambling for change, dreaming of a frozen treat. My favorite was always the cookies and cream bar. It had that perfect mix of crunchy and creamy. Well, I’ve spent years perfecting a version you can make right in your own kitchen, and believe me, it’s even better. These homemade Oreo fudge ice cream bars are an absolute dream, with three decadent layers of chocolatey goodness. And the best part? They are surprisingly simple to make. Let’s get started!
Quick Recipe
- Preparation Time:
35M - Cooking Time:
0M - Total Time:
7H20M(This includes approximately 6 hours and 45 minutes of inactive freezing time, which is essential for the bars to set properly.) - Type of dish: Dessert
- Cuisine: American
- Recipe Yield: 16 bars
- Calories: Approximately 430 per bar
Why You’ll Fall in Love with This Recipe
- There’s something truly special about making a dessert from scratch. When you make these homemade ice cream bars, you control the quality of the ingredients. You’ll notice the difference in the first bite—the cream is richer, and the chocolate flavor is deeper than anything you can buy in a box.
- Plus, this is the ultimate no bake dessert recipe. On a sweltering day, the last thing anyone wants to do is turn on the oven. This entire recipe comes together right in your freezer, keeping you and your kitchen cool. It’s my go-to treat for summer cookouts and family get-togethers.
The Magic is in the Layers: What You’ll Need
The beauty of this recipe is its simplicity. We’re using common pantry staples to create something truly spectacular. Let’s break down what goes into each delicious layer.
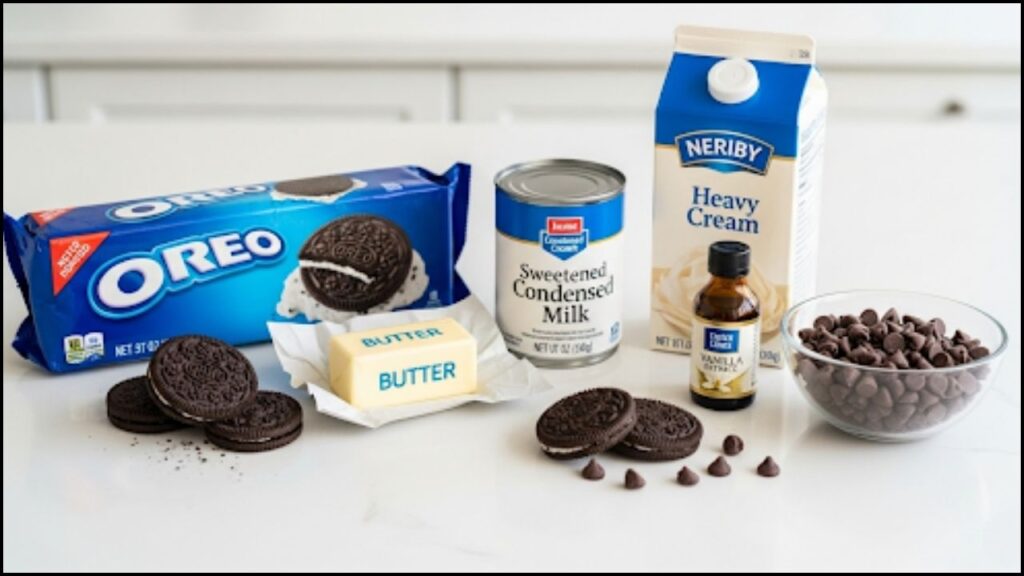
For the Crunchy Oreo Crust
This isn’t just a base; it’s the crunchy, chocolatey foundation of the whole dessert.
- 32 Oreo Cookies: Just a standard-size package will do. And yes, you use the whole cookie—cream filling and all! That filling has sugars and fats that help bind the crust together.
- 6 Tablespoons Unsalted Butter, melted: This is the glue that holds our delicious crust together.
For the Creamy No-Churn Ice Cream Filling
This is where the magic happens. You won’t believe how creamy this filling gets without an ice cream machine.
- 2 Cups Heavy Whipping Cream, cold: Make sure it’s very cold! Cold cream whips up much faster and creates more volume, which is the key to a light, airy ice cream texture.
- 1 (14-ounce) can Sweetened Condensed Milk: This is our secret weapon. It provides sweetness and, because of its high sugar content, it prevents the ice cream from freezing into a solid, icy block.
- 1 Teaspoon Vanilla Extract: For a touch of warmth and depth.
- 12 Oreo Cookies, coarsely chopped: These are folded in to give you those classic cookies-and-cream chunks in every bite.
For the Rich Chocolate Fudge Topping
This glossy top layer is the perfect finish. It adds a rich, satisfying snap when you bite into the bar.
- 1 cup Semi-Sweet Chocolate Chips: A classic choice that provides a nice balance of sweet and bitter.
- 1/2 cup Heavy Whipping Cream: This will create a softer, ganache-like topping that’s rich and fudgy without getting rock-hard in the freezer.
Essential Kitchen Tools
You don’t need anything fancy for this recipe, which is another reason I love it!
- 9×9 inch baking pan
- Parchment paper
- Food processor (or a large zip-top bag and a rolling pin)
- Electric mixer (a stand mixer or hand mixer works perfectly)
- Rubber spatula
- A few mixing bowls
Let’s Make Some Oreo Fudge Ice Cream Bars! (Step-by-Step)
Alright, are you ready to create the best dessert of the summer? I’ll walk you through every step. Just take it one layer at a time.
Step 1: Prepare Your Pan and Make the Crust
First things first, let’s get our pan ready. Line a 9×9-inch baking pan with parchment paper, leaving some overhang on two sides. These “handles” will make it so much easier to lift the bars out later. Trust me, don’t skip this step!
- Place the 32 whole Oreos into a food processor and pulse until they become fine crumbs. If you don’t have a food processor, pop them in a zip-top bag and smash them with a rolling pin—it’s great for getting out a little frustration!
- Pour the crumbs into a medium bowl and stir in the melted butter until everything is evenly moistened, like wet sand.
- Press the mixture firmly and evenly into the bottom of your prepared pan. I like to use the bottom of a flat measuring cup to get a nice, compact layer. A solid crust is key to a bar that holds together.
- Place the pan in the freezer for at least 15 minutes while you prepare the filling. This helps the crust set and creates a clean separation between your layers.
Step 2: Whip Up the No-Churn Ice Cream Filling
Now for the creamy, dreamy center. The most important part here is whipping the cream correctly.
- In a large bowl, using an electric mixer, beat the cold heavy whipping cream on medium-high speed until stiff peaks form. What are stiff peaks? When you lift the beaters out of the cream, the peak that forms should stand up straight and not flop over. This air is the structure of your ice cream!
- In a separate bowl, stir together the sweetened condensed milk and vanilla extract.
- Gently fold about a cup of the whipped cream into the condensed milk mixture. This lightens it up. Then, gently fold the lightened mixture back into the rest of the whipped cream. Use a spatula and a light hand you want to keep all that beautiful air you just whipped in.
- Finally, fold in your 12 chopped Oreos.
Step 3: Assemble and Freeze
It’s time to bring the first two layers together.
- Take your pan with the chilled crust out of the freezer. Pour the ice cream filling over the crust and spread it into an even layer with your spatula.
- Cover the pan tightly with plastic wrap or foil. Freeze for at least 6 hours, but I strongly recommend freezing it overnight. A long, hard freeze is essential for getting those super clean, sharp slices. Patience here will pay off!
Step 4: Add the Fudge Topping
Once your ice cream layer is frozen solid, you’re ready for the grand finale.
- In a microwave-safe bowl, combine the chocolate chips and heavy cream. Microwave in 30-second bursts, stirring in between, until the chocolate is melted and the mixture is smooth.
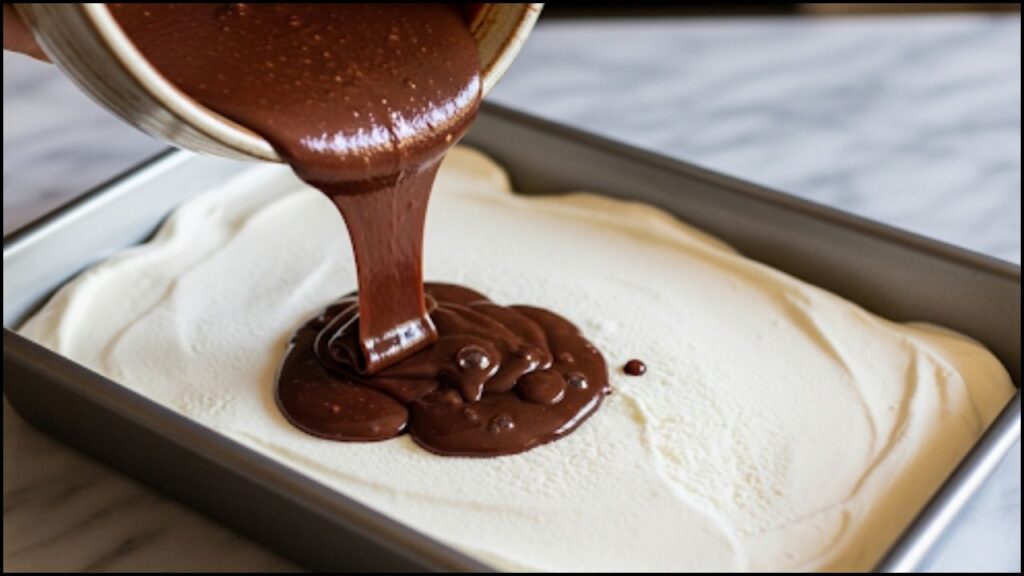
- Let the fudge topping cool for about 5-10 minutes. You want it to be pourable, but not hot. If it’s too warm, it will melt your beautiful ice cream layer on contact.
- Remove the pan from the freezer. Pour the cooled fudge topping over the ice cream layer and quickly spread it to the edges.
- If you like, sprinkle a few extra Oreo crumbs on top for decoration.
- Return the pan to the freezer for one last time, for at least 30-60 minutes, to allow the fudge to set completely.
Tips for Perfect Homemade Ice Cream Bars Every Time
- Don’t Skimp on the Freeze Time: I know it’s tempting to dig in early, but a fully frozen dessert is much easier to cut and serve. Overnight is truly best.
- The Parchment Paper Sling: I’ll say it again because it’s so important! Those parchment paper handles are a game-changer for lifting the entire block out of the pan for easy cutting.
- Cutting Like a Pro: For perfectly clean slices, run a large, sharp knife under hot water. Quickly wipe it dry, then make your cut. Repeat this for each slice. The hot blade melts through the layers for a flawless edge.
- Get Creative! Feel free to use Golden Oreos for a vanilla version, or add a teaspoon of mint extract to the filling for a mint-chocolate chip vibe.
A Treat Worth Making
There is so much joy in serving a dessert that you made with your own hands, especially one that looks and tastes this incredible. These Oreo fudge ice cream bars are more than just a recipe; they’re a way to create happy memories. They’ll take you right back to those carefree summer days, but with a richer, more satisfying flavor that you can be proud of. I hope you and your family love them as much as mine does. Happy dessert making!
Fudgy Chocolate Cake Bars: The Ultimate Recipe for Decadent Bliss


