The Absolute Best Salted Maple Pecan Pie Bars (Easier Than Pie!)
Discover the best salted maple pecan pie bars, featuring a buttery shortbread crust and a gooey, pure maple filling. This easy, no-fuss recipe is perfect for home cooks and delivers all the flavor of pecan pie without the work.
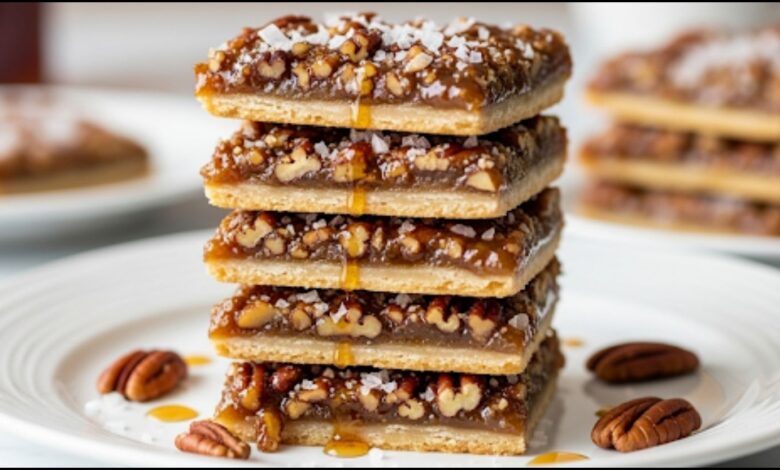
There’s a certain magic to fall baking, isn’t there? The whole house fills with the scent of butter and spice. But let’s be honest, holiday gatherings can get hectic. Sometimes, crafting a perfect, crimped-edge pie feels like one task too many. That’s where my secret weapon comes in: these incredible salted maple pecan pie bars. They have all the soul-warming flavor of a classic pecan pie—the crunchy nuts, the gooey filling—but are infinitely easier to make, serve, and share.
This recipe trades the traditional, fussy pie crust for a simple, press-in shortbread base that is absolutely foolproof. The filling ditches corn syrup for pure maple syrup, giving it a richer, more authentic flavor that pairs beautifully with a sprinkle of flaky sea salt. Trust me, once you bring a pan of these to a family dinner or a potluck, you’ll never look back. Let’s get baking!
Quick Recipe
- Preparation Time:
30M - Cooking Time:
45M - Total Time:
1H15M - Type of dish: Dessert
- Cuisine: American
- Recipe Yield: 24 bars
- Calories: Approximately 280-320 kcal per bar (estimate)
Why This Recipe Just Works
| Key Takeaway | Why It Matters |
| No-Fail Shortbread Crust | A simple, press-in crust means no rolling pins or complicated techniques. It’s buttery, tender, and the perfect base. |
| Pure Maple Filling | Using real maple syrup instead of corn syrup provides a deeper, more complex sweetness that feels truly special. |
| Perfectly Portable | Bars are easier to cut, serve, and transport than a traditional pie, making them ideal for parties and gatherings. |
| Make-Ahead Friendly | You can bake these a day or two in advance. In fact, they taste even better after the flavors have had time to meld! |
The Difference is in the Details: Why These Bars are the Best
I’ve been making these maple pecan bars for years, tweaking the recipe until it was just right. The goal was to capture everything we love about pecan pie but in a more relaxed, approachable format. The foundation is the shortbread crust. It’s thick, buttery, and sturdy enough to hold that luscious filling. We par-bake it just slightly, which is a simple step that makes a huge difference. It ensures the crust stays crisp and doesn’t get soggy—a common pitfall with bar recipes.
Then there’s the star of the show: the filling. By using 100% pure maple syrup, we get a flavor that’s both sweet and slightly woodsy. A touch of brown sugar adds a caramelly depth, and the eggs create a custardy texture that sets up perfectly. Finally, a generous sprinkle of flaky sea salt on top cuts through the richness and makes every single bite pop. It’s that perfect sweet-and-salty combination that keeps everyone coming back for one more.
Simple Ingredients for Incredible Flavor
You don’t need anything too fancy to make these bars, but quality really counts, especially with the maple syrup. Here’s what you’ll gather.
For the Buttery Shortbread Crust
- All-Purpose Flour: The simple foundation for our crust.
- Light Brown Sugar: Adds a hint of moisture and molasses flavor.
- Salt: Just a pinch to balance the sweetness.
- Unsalted Butter: Make sure it’s cold and cubed! Cold butter is the secret to a tender, melt-in-your-mouth crust. It creates tiny pockets of steam as it bakes, resulting in a lighter texture.
For the Gooey Maple Pecan Filling
- Unsalted Butter: Melted this time, to add richness.
- Pure Maple Syrup: The star! Please don’t use pancake syrup here; it won’t provide the same flavor. Look for Grade A Amber or Dark for the best taste.
- Light Brown Sugar: Complements the maple syrup beautifully.
- Eggs: These bind the filling together and give it that classic custardy set.
- Vanilla Extract: A non-negotiable for warmth and depth.
- Pecan Halves: The heart of our pecan pie bars. I recommend toasting them first for an extra nutty flavor, but it’s optional if you’re short on time.
- Flaky Sea Salt: For sprinkling on top. Maldon sea salt is fantastic for this.
Essential Kitchen Tools
You likely have everything you need already! No special equipment is required.
- 9×13-inch baking pan
- Parchment paper
- Mixing bowls
- Whisk
- Spatula
How to Make Salted Maple Pecan Pie Bars: Step-by-Step
Let’s walk through this together. I’ll share my best tips along the way to guarantee your success.
Step 1: Get Ready
- First things first, preheat your oven to 350°F (175°C).
- Now, for my favorite kitchen hack: line your 9×13-inch baking pan with parchment paper, leaving a couple of inches of overhang on the two long sides. This creates a “sling” that will let you lift the entire slab of bars out of the pan later for easy, perfect cutting. No more digging out that first tricky piece!
Step 2: Make the Shortbread Crust

- In a medium bowl, whisk together the flour, brown sugar, and salt. Add your cold, cubed butter. Using a pastry cutter or your fingertips, cut the butter into the flour mixture until it resembles coarse, damp sand. Don’t overwork it!
- Firmly press this mixture into the bottom of your prepared pan, creating an even layer. I like to use the bottom of a measuring cup to get it nice and flat.
Step 3: Par-Bake the Crust
Bake the crust for 15-18 minutes, or until the edges are just beginning to turn a light golden brown. This is called “par-baking,” and it’s our insurance against a soggy bottom. It gives the crust a head start to get firm and crisp.
Step 4: Mix the Filling
While the crust is baking, you can make the filling. It’s so easy. In a large bowl, whisk together the melted butter, maple syrup, and brown sugar until smooth. Add the eggs, one at a time, whisking well after each addition. Finally, stir in the vanilla extract. Don’t over-mix—just combine until everything is incorporated.


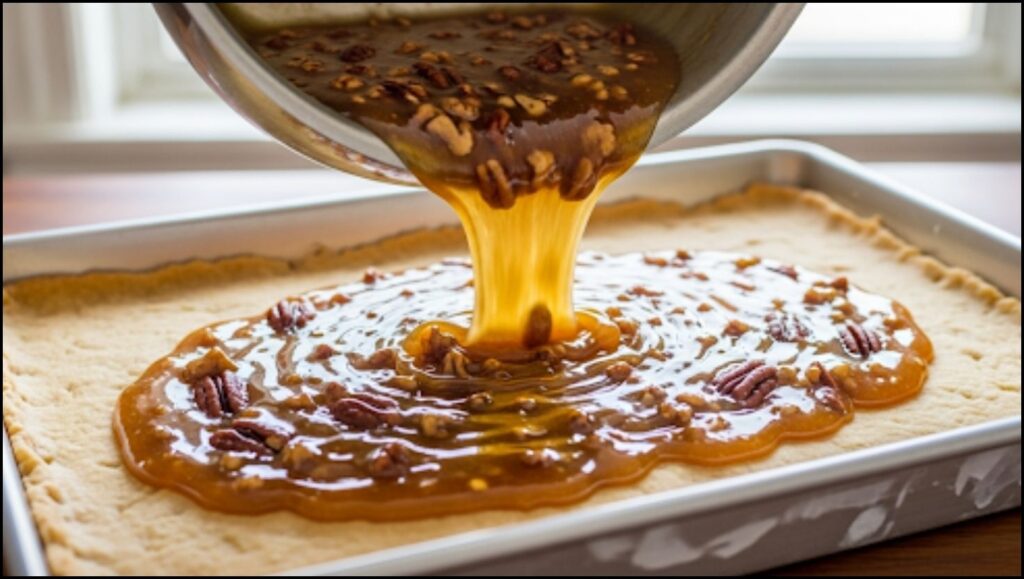
Step 5: Add Pecans and Bake
- Stir the pecan halves into the filling. Once the crust is out of the oven, immediately pour the filling over the hot crust and spread it out evenly.
- Return the pan to the oven and bake for 25-30 minutes. You’ll know it’s done when the edges are puffed and set, and the center is mostly set but may still have a very slight jiggle. It will continue to firm up as it cools.
Step 6: Cool, Salt, and Cut
- Sprinkle the top with flaky sea salt while the bars are still warm. Now for the hardest part: you must let the bars cool completely in the pan on a wire rack. I mean it! This takes at least 2-3 hours. If you try to cut them while they’re warm, you’ll have a gooey (though delicious) mess. Patience here is key for clean, beautiful squares.
- Once completely cooled, use your parchment paper sling to lift the entire block out of the pan. Place it on a cutting board and slice into bars.
Your New Favorite Holiday Treat
These salted maple pecan pie bars are more than just a recipe; they’re a solution. They’re for when you want the nostalgic taste of a holiday classic without all the fuss. They’re reliable, unbelievably delicious, and guaranteed to earn you rave reviews. Give them a try for your next gathering. I have a feeling they’ll become a staple in your baking repertoire, just as they have in mine. Happy baking!
Peanut Butter Pie Shooters: The Easiest No-Bake Dessert You’ll Ever Make


