Homemade Easy Whole Wheat Pizza Dough: Your New Go-To Recipe
Master the art of homemade pizza with this simple and reliable easy whole wheat pizza dough recipe. Learn the secrets to a light, airy crust using everyday ingredients and a few simple techniques. Say goodbye to store-bought crusts and hello to a healthier, more delicious pizza night.

Do you ever find yourself staring into the fridge on a Friday night, dreaming of a perfect, cheesy pizza, but dreading the heavy feeling that comes with ordering takeout? Or maybe you’ve tried making pizza from scratch before, only to end up with a dense, flat crust that just doesn’t taste like the real deal. I’ve been there! For years, I struggled to find a simple pizza dough recipe that was both wholesome and truly delicious. After countless experiments, I finally perfected this easy whole wheat pizza dough recipe. It’s light, chewy, and has a wonderful nutty flavor that will make you feel great about what you’re eating. The best part? It’s so simple, you’ll wonder why you ever bought a pre-made crust. Get ready to make pizza night a healthy, homemade tradition you’ll look forward to.
Quick Recipe
- Preparation Time: 2H
- Cooking Time: 15M
- Total Time: 2H15M
- Type of dish: Main Course
- Cuisine: Italian American
- Recipe Yield: Makes two 12-inch pizzas
- Calories: 1800
Key Takeaways
- Simple Ingredients, Amazing Results: You only need five basic ingredients to create a perfect whole wheat crust. No fancy flours or special equipment required.
- The Secret to a Light Crust: We’ll use a simple technique to make sure your dough rises beautifully, giving you that airy texture you crave.
- A Healthier Choice: Enjoy pizza night without the guilt! Using whole wheat flour adds fiber and nutrients, making it a truly wholesome meal.
- Kid-Friendly Fun: This recipe is perfect for getting the whole family involved. Let the kids help knead the dough and add their favorite toppings.
Why Whole Wheat Flour? The “Why” Behind the Swap
Before we dive into the recipe, let’s talk about why we’re using. You might have heard that working with whole wheat flour can be tricky. It’s true that it behaves a little differently than all-purpose flour. Whole wheat flour contains the entire wheat kernel, including the bran and germ. The bran, in particular, has sharp edges that can cut the gluten strands in the dough, which are what give the dough its structure and elasticity.
This is why some whole wheat bread and pizza crusts can feel dense or tough. But don’t worry! My recipe, developed with tips from the King Arthur Baking Company, uses a specific ratio and a simple resting period to ensure a soft, pliable, and perfectly chewy crust. You’ll get all the health benefits of whole grains fiber, vitamins, and minerals—without sacrificing texture or taste.
Getting Started: Your Essential Tools
You don’t need a lot of special equipment for this recipe. A stand mixer is great, but your hands will work just fine. Here are the few things you’ll need to make this a breeze.
- Large mixing bowl: For combining the dry ingredients and letting the dough rise.
- Measuring cups and spoons: Accuracy is key!
- Spatula or spoon: For stirring.
- Stand mixer with a dough hook (optional): This makes kneading a lot easier, but it’s not essential.
- Kitchen scale (highly recommended): For the most accurate results, especially with flour.

The Recipe: Your Step-by-Step Guide to Perfect Pizza Dough
This is the part I get most excited about! Follow these steps, and you’ll have a beautifully soft and workable dough ready for your favorite toppings.
Step 1: Proof the Yeast (The Most Important Part!)
- This is the step that guarantees your dough will rise, so don’t skip it! It’s a fun little science experiment. In a medium-sized bowl, combine 1 ¼ cups of warm water (between 105–115°F or 40–46°C) with 2 teaspoons of active dry yeast and 1 tablespoon of honey or maple syrup.
- Why the honey? The sugar isn’t just for taste; it’s food for the yeast! The yeast will “eat” the sugar and create carbon dioxide, which is what makes the dough light and airy. The water temperature is also critical. If it’s too cold, the yeast won’t activate. If it’s too hot, you’ll kill it. Let the mixture sit for 5–10 minutes. It should become bubbly and frothy on top. If it doesn’t, your yeast might be old. Start over with a fresh packet.
Step 2: Mix the Dough
- In a large bowl, whisk together 2 cups of whole wheat flour, 1 cup of all-purpose flour, and 1 ½ teaspoons of salt. Using a mix of whole wheat and all-purpose flour is my secret for a light, fluffy dough that’s still wholesome. The all-purpose flour provides the necessary gluten structure, while the whole wheat flour gives it that lovely nutty flavor and texture.
- Next, pour the yeast mixture and 2 tablespoons of olive oil into the dry ingredients. Stir with a spatula until a shaggy dough forms. Now, it’s time to get your hands dirty!
Step 3: Knead, Knead, Knead!
- This is where you build the strength and elasticity of the dough. Turn the shaggy dough out onto a lightly floured surface. Knead for about 8–10 minutes. Your arm will get a workout! Push the dough away from you with the heel of your hand, fold it over, rotate it, and repeat.
- If you’re using a stand mixer, attach the dough hook and knead on medium speed for about 5–7 minutes.
- The dough is ready when it feels smooth, elastic, and springs back when you gently poke it with your finger. It should not be sticky. If it is, add a little more flour, one tablespoon at a time, until it reaches the right consistency.
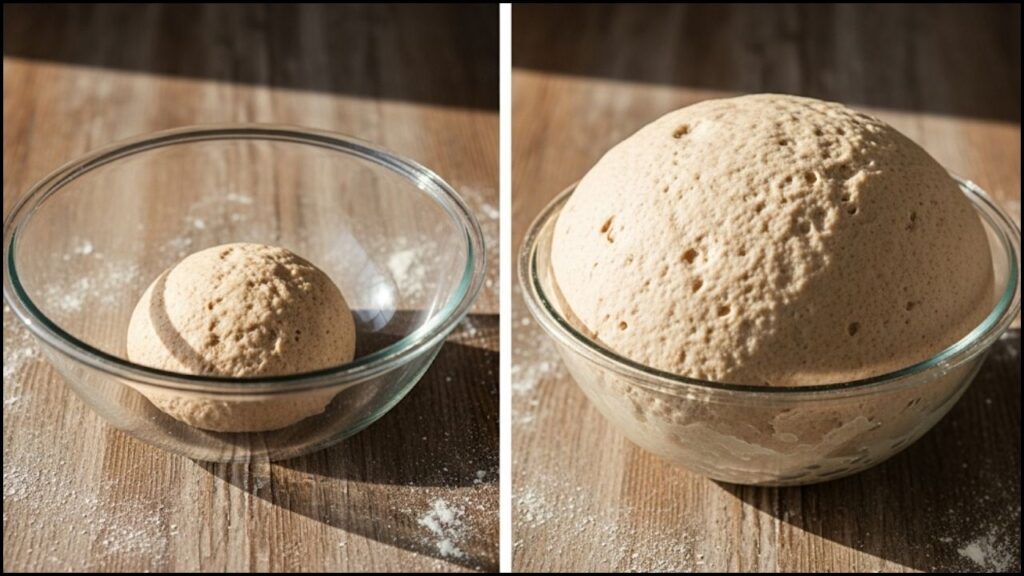
Step 4: Let It Rise!
- This is the waiting game, but it’s essential for that perfect texture. Lightly grease a large bowl with olive oil. Place the kneaded dough in the bowl, turning it once to coat the top. Cover the bowl with plastic wrap or a damp kitchen towel.
- Place the bowl in a warm, draft-free spot. My favorite trick is to turn on my oven for a minute, then turn it off, and place the covered bowl inside. Let the dough rise until it has doubled in size, which should take about 1 to 1 ½ hours.
Step 5: Shape the Dough and Get Ready to Bake
- Once the dough has risen, punch it down to release the air. This is so satisfying! Turn the dough out onto a lightly floured surface and divide it into two equal balls for two medium-sized pizzas, or one large one.
- Preheat your oven to 450°F (232°C). For the best crust, I highly recommend using a pizza stone or an inverted baking sheet. Place it in the oven while it preheats.
- Gently stretch and press the dough into your desired shape. I love a rustic, free-form look, but you can also use a rolling pin if you prefer. Avoid overworking the dough here. Once it’s shaped, carefully transfer it to a piece of parchment paper or a lightly floured pizza peel. Now, you’re ready for the toppings! This dough pairs beautifully with robust, flavorful toppings that stand up to its earthy taste. I love using roasted vegetables and a zesty marinara.
Tips and Tricks for a Perfect Crust
- Don’t Rush the Rise: The rising time is crucial for developing flavor and texture. If your kitchen is cool, it might take longer. Be patient!
- The Best Whole Wheat Flour: Not all flours are created equal. I’ve had the best luck with brands like Bob’s Red Mill or King Arthur, which you can find at most grocery stores.
- Freeze It! This recipe is perfect for meal prep. Once the dough has risen, you can punch it down, form it into a ball, and place it in a freezer bag. It will last for up to three months. To use, just let it thaw in the refrigerator overnight.
A Final Thought on Pizza Night
Making your own pizza from scratch is one of the most rewarding experiences in the kitchen. There’s something truly special about creating a meal from just a few simple ingredients and watching it transform. This easy whole wheat pizza dough recipe is a game-changer, and it has become a staple in my home. I hope it becomes one in yours, too. Happy Baking!
The Absolute Best Healthy Cookie Dough (Ready in 10 Minutes!)


