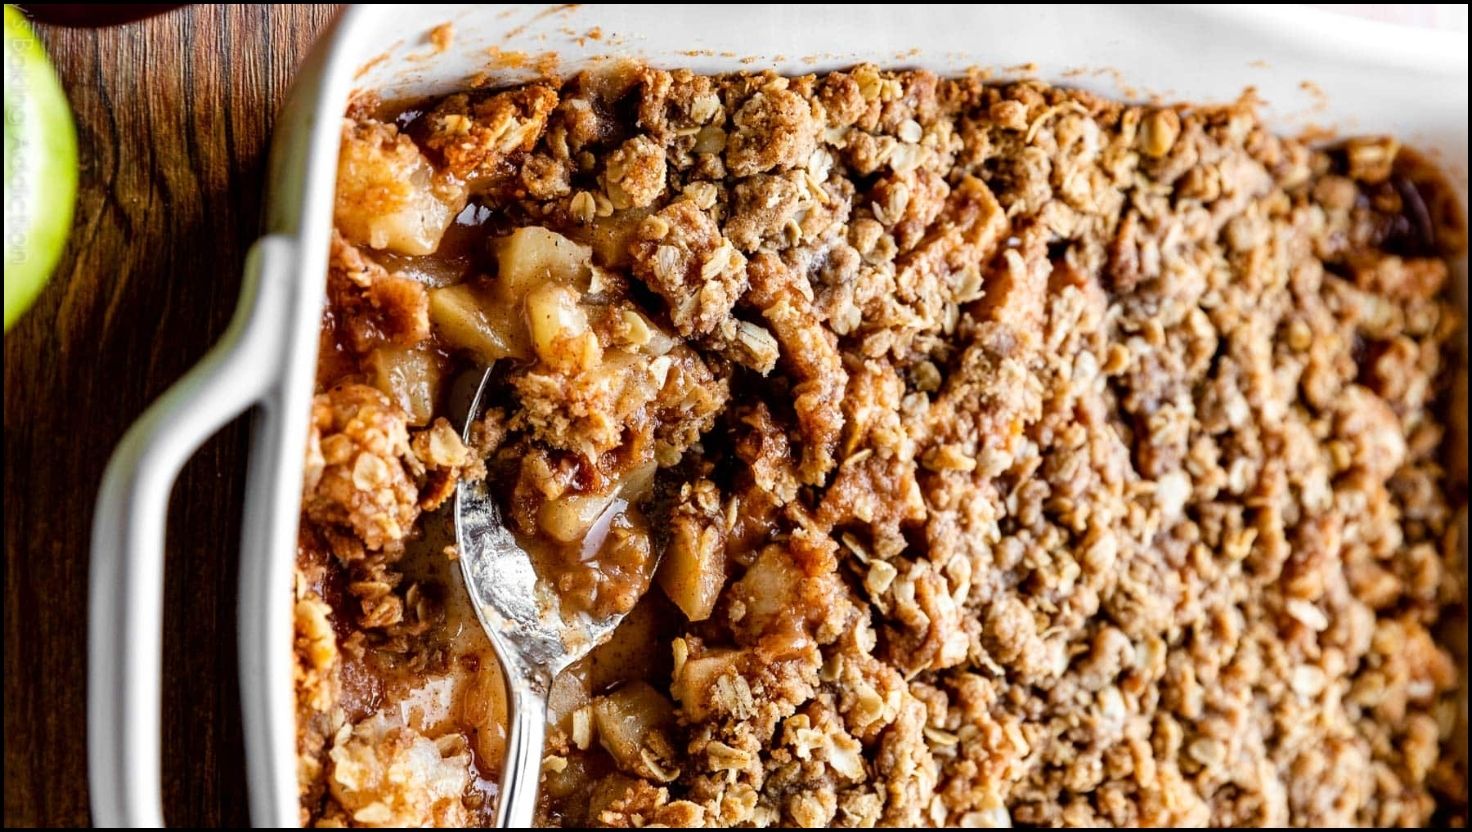
There’s a certain magic that happens when the crisp autumn air starts to roll in. For me, it signals a return to cozy sweaters, warm mugs of cider, and the comforting aroma of baked goods filling my kitchen. And at the top of that baking list, year after year, is this Classic Apple Crisp.
I’ve tinkered with countless apple crisp recipes over the years, from my grandmother’s handwritten card to fancy versions in glossy cookbooks. This recipe is the culmination of all that love and learning—a simple, no-fuss dessert that delivers on all its promises. Imagine tender, juicy apples swimming in a lightly spiced cinnamon-sugar sauce, all tucked under a ridiculously crunchy, buttery oat topping. It’s the kind of dessert that feels like a warm hug from the inside out. Let’s get baking!
Quick Recipe
- Preparation Time:
20M - Cooking Time:
40M - Total Time:
1H - Type of dish: Dessert
- Cuisine: American
- Recipe Yield: 8 servings
- Calories: 385 kcal per serving
What Makes This Apple Crisp a Keeper
| Key Takeaway | Why It Matters |
| Perfectly Tender Apples | We pre-cook the apples slightly to ensure they’re perfectly soft and not crunchy when the crisp comes out of the oven. |
| Extra-Crispy Topping | Using melted butter and a specific oat-to-flour ratio creates a topping that stays wonderfully crisp, never soggy. |
| Balanced Sweetness | This recipe balances the tartness of the apples with just the right amount of sugar for a flavor that’s not overly sweet. |
| Simple, Reliable Steps | Clear, easy-to-follow instructions guarantee success, even for beginner bakers. |
Everything You’ll Need: Ingredients & Tools
One of the things I love most about this recipe is its simplicity. It uses pantry staples you likely already have on hand, especially during the fall baking season.
Essential Kitchen Tools
You don’t need any fancy gadgets for this one! Here’s the short list:
- 8×8 inch baking dish (a 9-inch pie plate also works beautifully)
- A couple of mixing bowls
- Vegetable peeler and a good knife
- Measuring cups and spoons
- A spatula or large spoon for mixing
Making Your Classic Apple Crisp, Step-by-Step
Let’s break this down into two easy parts: the glorious apple filling and that irresistible crispy topping. I’ll walk you through each step and explain the why behind it, so you’ll feel confident every step of the way.
Part 1: The Juicy Apple Filling
The heart of any good apple crisp is, of course, the apples. The right preparation makes all the difference between a good crisp and a great one.
Ingredients for the Filling:
- 4 medium baking apples (about 2 pounds)
- 1/4 cup light brown sugar, packed
- 1 tablespoon all-purpose flour
- 1 teaspoon ground cinnamon
- 1/4 teaspoon ground nutmeg
- Pinch of salt
- 1 tablespoon lemon juice
- 1 teaspoon vanilla extract
Instructions:
- Prep Your Oven and Dish: First things first, preheat your oven to 375°F (190°C). Lightly grease your 8×8 inch baking dish with butter or non-stick spray. This little step ensures you can easily scoop out every last delicious bite.
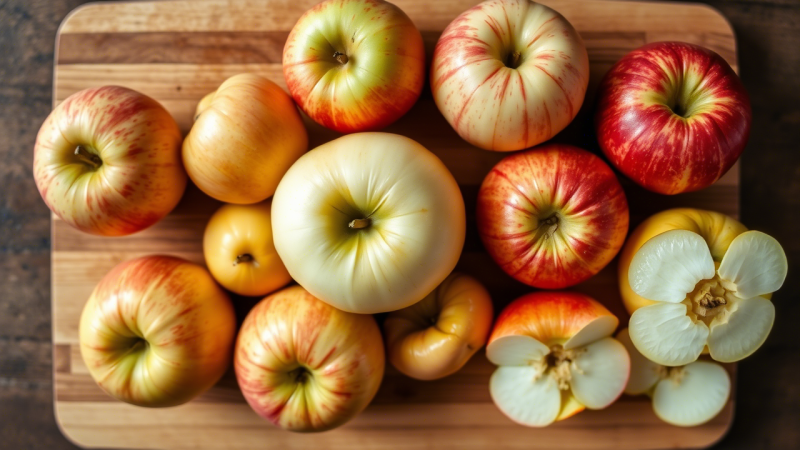
- Choose and Prep Your Apples: The best apples for a crisp are ones that hold their shape when baked and offer a nice balance of sweet and tart flavors. I love using a mix of Granny Smith for that classic tartness and Honeycrisp or Braeburn for a sweeter, firm bite. This combination creates a more complex and interesting apple dessert. Peel, core, and slice your apples into about 1/4-inch thick slices. Try to keep the slices relatively uniform in thickness so they cook evenly.
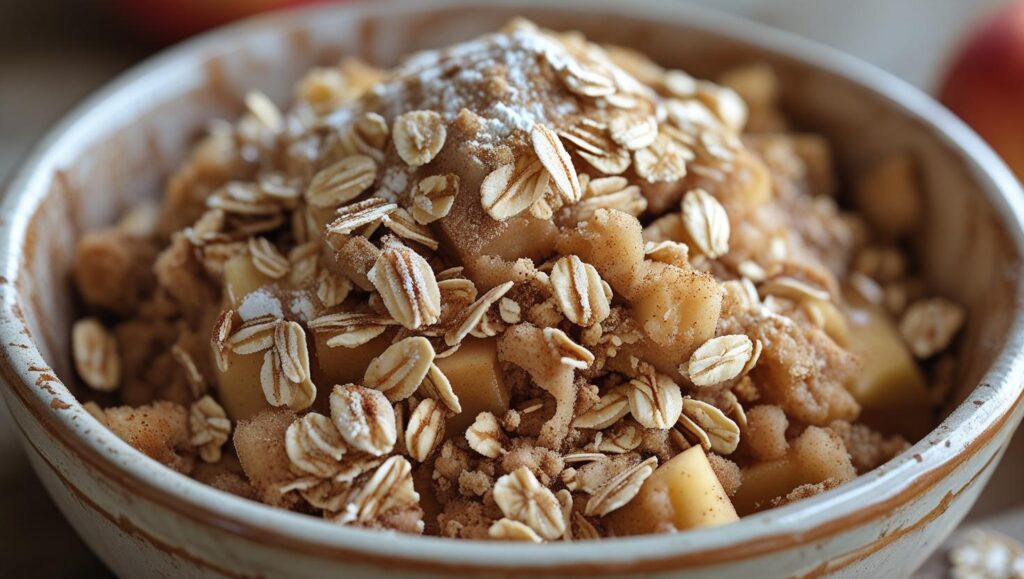
- Combine the Filling Ingredients: In a large bowl, gently toss the apple slices with the brown sugar, flour, cinnamon, nutmeg, salt, lemon juice, and vanilla extract. The flour is a key player here; it helps thicken the juices the apples release as they bake, creating that wonderful syrupy sauce instead of a watery bottom. The lemon juice not only adds a touch of brightness but also prevents the apples from browning too quickly.
- Arrange in the Dish: Pour the apple mixture into your prepared baking dish and spread it into an even layer. Set this aside while you make the magic happen with the topping.
Part 2: The Perfect Oat Topping
Now for my favorite part—the topping! This is what makes a crisp a crisp. The secret to a truly crispy topping is using melted butter, which coats all the dry ingredients evenly and helps them “fry” into a crunchy layer in the oven’s heat.
Ingredients for the Topping:
- 1 cup old-fashioned rolled oats (not instant!)
- 1/2 cup all-purpose flour
- 1/2 cup light brown sugar, packed
- 1/2 teaspoon ground cinnamon
- Pinch of salt
- 1/2 cup (1 stick) unsalted butter, melted
Instructions:
- Mix the Dry Ingredients: In a separate medium bowl, whisk together the old-fashioned rolled oats, flour, brown sugar, cinnamon, and salt. Using old-fashioned oats is a must for the best texture; instant oats can become mushy.
- Add the Melted Butter: Pour the melted butter over the dry ingredients. Use a fork or your fingers to mix everything together until it forms crumbly, pebble-sized clumps. Don’t overmix; you want to keep that lovely, rustic texture.
- Top the Apples: Evenly sprinkle the topping mixture over the apples in the baking dish. Make sure to cover the fruit all the way to the edges.
Part 3: Bake to Golden Perfection
Now it’s time for the oven to do its work.
- Bake: Place the baking dish on a baking sheet to catch any potential drips from the bubbling fruit. Bake for 30-40 minutes, or until the fruit filling is hot and bubbly and the topping is a deep golden brown. Your kitchen will smell absolutely divine!
- Rest and Serve: This might be the hardest part! Let the homemade apple crisp cool on a wire rack for at least 15-20 minutes before serving. This allows the filling to set up a bit. If you cut into it right away, it will be very runny (though still delicious!).
This Classic Apple Crisp is absolutely heavenly on its own, but serving it warm with a scoop of vanilla ice cream or a dollop of fresh whipped cream takes it to another level of dessert perfection.
A Perfect Dessert for Any Occasion
This Classic Apple Crisp has become a staple in my home for a reason. It’s reliable, it’s incredibly delicious, and it brings a sense of warmth and comfort to any table. Whether you’re a seasoned baker or just starting, this recipe is designed to give you a perfect result every time.
So go ahead, fill your home with the scent of baked apples and cinnamon. You’ve got this!
The Ultimate Butternut Squash Mac and Cheese with Bacon and Apple
 The Ultimate Filipino Fried Chicken Recipe for Crispy, Juicy Perfection
 Unlock Flavor: How to Make the Perfect Avocado Veggie Panini Every Time
 The Easiest Weeknight Chicken Pizzaiola Dish You’ll Ever Make
 The Secret to a Perfectly Healthy Homemade Palak Paneer