Your New Favorite Summer Treat: Chocolate Chip Cookie Ice Cream Bars!
Dive into pure joy with these homemade Chocolate Chip Cookie Ice Cream Bars! This easy-to-follow recipe combines chewy cookies and creamy ice cream for a perfect, customizable frozen treat. Learn the secrets to creating this irresistible dessert that's ideal for summer or any time you crave sweet nostalgia.
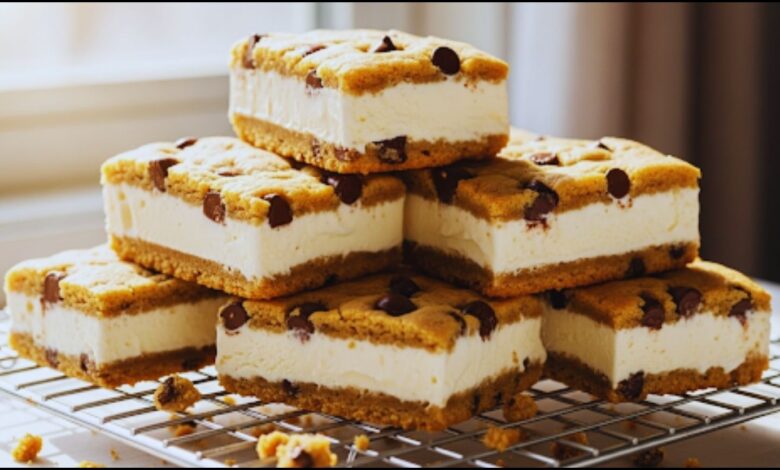
Have you ever found yourself on a sweltering summer afternoon, dreaming of something perfectly sweet, wonderfully cold, and undeniably comforting? Maybe you’re picturing that classic ice cream truck treat, but with a homemade twist? Well, you’re in luck, because today we’re making the most irresistible Chocolate Chip Cookie Ice Cream Bars!
This isn’t just any dessert; it’s a slice of pure joy, combining the chewy, golden perfection of your favorite chocolate chip cookies with creamy, dreamy ice cream. Forget complicated techniques; I’m going to walk you through every step, ensuring you create a dessert that will have everyone asking for your secret. Trust me, if I can make these for my notoriously picky eaters and get rave reviews every time, you can too! Get ready to impress yourself and everyone you share them with.
Quick Recipe
- Preparation Time: 45M
- Cooking Time: 40M
- Total Time: 1H25M
- Type of dish: Dessert
- Cuisine: American
- Recipe Yield: 12-16 bars
- Calories: 350-450 calories per bar
Why You’ll Love These Chocolate Chip Cookie Ice Cream Bars
These Chocolate Chip Cookie Ice Cream Bars are more than just a dessert; they’re an experience!
- Effortlessly Impressive: Looks fancy, but is surprisingly simple to assemble.
- Crowd-Pleaser: Loved by kids and adults alike, perfect for parties or a family treat.
- Customizable: Easily adapt with your favorite ice cream flavors or mix-ins.
- Make-Ahead Magic: Prepare them in advance, so dessert is ready when you are!
The Secret to Amazing Cookie Ice Cream Bars
The beauty of these Chocolate Chip Cookie Ice Cream Bars lies in their simplicity and the quality of their components. We’re starting with a classic chocolate chip cookie dough – one that bakes up soft and chewy, but still has enough structure to hold up to a layer of ice cream.
I’ve experimented with countless cookie recipes over the years, and the key here is a dough that spreads just enough to create an even layer without becoming too thin or crispy. The “why” behind this is crucial: a cookie that’s too thin might shatter when you slice the bars, and one that’s too crispy won’t offer that delightful chewiness that pairs so well with smooth ice cream.
Gathering Your Ingredients
Before we dive into the steps, let’s make sure you have everything you need. Having all your ingredients measured and ready, a concept known as “mise en place” in culinary circles, really helps make the process smooth and enjoyable.

For the Chocolate Chip Cookie Layers:
- 1 cup (2 sticks) unsalted butter, softened: Softened butter creams beautifully with sugar, creating a light, airy base for your cookies.
- ¾ cup granulated sugar: Provides sweetness and helps with browning.
- ¾ cup packed light brown sugar: Adds moisture, chewiness, and that classic caramel note.
- 2 large eggs: Binds everything together and adds richness.
- 1 teaspoon vanilla extract: Essential for that warm, inviting cookie flavor.
- 2 ¼ cups all-purpose flour: The structure of our cookies.
- 1 teaspoon baking soda: Helps the cookies spread and become tender.
- ½ teaspoon salt: Balances the sweetness and enhances flavor.
- 1 ½ cups chocolate chips (milk, semi-sweet, or a mix): Because what’s a chocolate chip cookie without them? I personally love a mix of semi-sweet and milk chocolate for depth of flavor.
For the Ice Cream Filling:
- 1.5 quarts (about 6 cups) ice cream of your choice, slightly softened: This is where the fun begins! Vanilla is a classic, but don’t be afraid to get creative. Strawberry, mint chip, or even coffee ice cream would be amazing. The “slightly softened” part is key – it makes spreading so much easier!
Tools You’ll Need
Having the right tools makes all the difference!
- 9×13 inch baking pan: Essential for forming the bars.
- Parchment paper: Makes for easy lifting and less mess!
- Electric mixer (stand or hand-held): For creaming butter and sugar effectively.
- Large mixing bowls: For combining ingredients.
- Spatula or offset spatula: For spreading the ice cream.
- Sharp knife: For clean slices.
- Measuring cups and spoons: Accuracy is important in baking!
Let’s Bake! Step-by-Step Instructions
This recipe might seem like a few steps, but each one is simple and builds on the last. Take your time, enjoy the process, and remember, baking is a journey, not just a destination!
Step 1: Prep Your Pan and Oven
Preheat your oven to 375°F (190°C). Line a 9×13 inch baking pan with parchment paper, leaving an overhang on the sides. This overhang will act as “handles” later, making it super easy to lift your finished bars out of the pan. Why do we do this? It prevents sticking and ensures a clean removal, which is especially helpful when dealing with frozen treats.


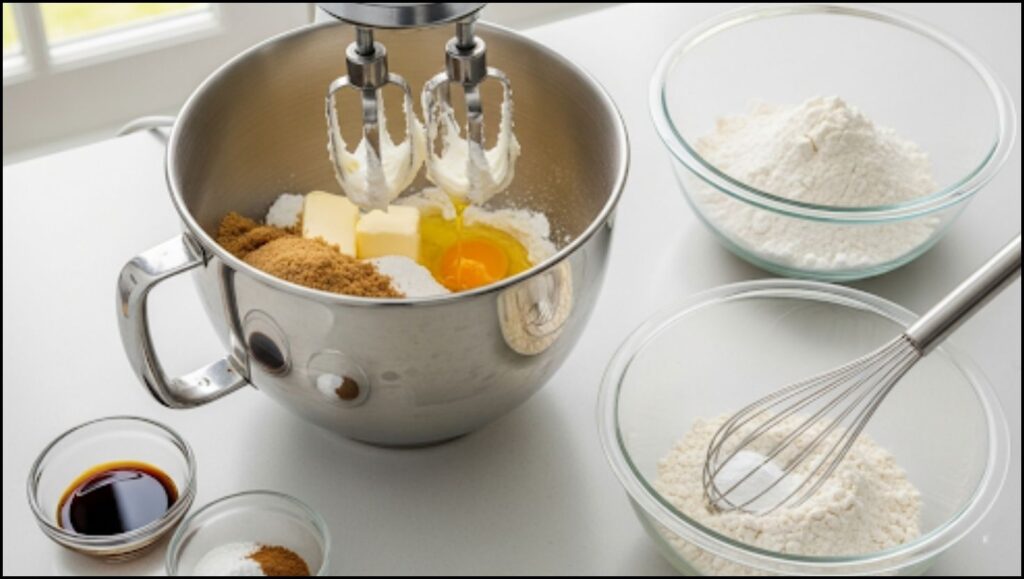
Step 2: Make the Cookie Dough
- In a large bowl, using an electric mixer, cream together the softened butter, granulated sugar, and brown sugar until light and fluffy. This usually takes about 2-3 minutes. This creaming step incorporates air into the butter and sugar, which contributes to the cookies’ tender texture.
- Beat in the eggs one at a time, then stir in the vanilla extract. Scrape down the sides of the bowl to ensure everything is well combined.
- In a separate medium bowl, whisk together the flour, baking soda, and salt. Gradually add the dry ingredients to the wet ingredients, mixing on low speed until just combined. Be careful not to overmix, as this can lead to tough cookies.
Finally, stir in the chocolate chips by hand until evenly distributed.
Step 3: Bake the First Cookie Layer
- Press about two-thirds of the cookie dough evenly into the bottom of your prepared 9×13 inch pan. Use your hands or a flat bottomed glass to ensure an even layer. This will be the sturdy base for your homemade ice cream bars.
- Bake for 18-22 minutes, or until the edges are golden brown and the center is set. The cookie layer should look fully baked, but still feel a little soft in the middle when gently pressed. Remove from the oven and let it cool completely in the pan on a wire rack. This is crucial! If you add ice cream to a warm cookie, you’ll have a melted mess. Patience is a virtue here.
Step 4: Bake the Second Cookie Layer
- While the first cookie layer is cooling, you can prepare the second cookie layer. On a separate baking sheet lined with parchment paper, press the remaining one-third of the cookie dough into another 9×13 inch rectangle (or as close as you can get, don’t stress about perfection). You could also freehand form it, as it will be the top layer.
- Bake for 15-20 minutes, or until golden brown. This second layer will be placed on top of the ice cream, so it doesn’t need to be as robust as the bottom layer. Let this cookie layer cool completely as well. Pro tip: If your second cookie layer doesn’t come out perfectly rectangular, don’t worry! You can always trim it slightly or even break it into pieces to place on top, giving it a rustic look.
Step 5: Assemble Your Chocolate Chip Cookie Ice Cream Bars
- Once both cookie layers are completely cool, it’s time for the fun part!
- Ensure your ice cream is slightly softened. If it’s rock solid, let it sit on the counter for 10-15 minutes until it’s pliable enough to spread, but not melted.
- Spoon the softened ice cream evenly over the cooled cookie layer in the 9×13 inch pan. Use an offset spatula or the back of a spoon to spread it out smoothly to the edges. I find that working quickly here helps keep the ice cream from melting too much.
- Carefully place the second cooled cookie layer on top of the ice cream, gently pressing it down to adhere.
Step 6: Freeze and Serve!
- Cover the pan tightly with plastic wrap or aluminum foil. Place the pan in the freezer for at least 4-6 hours, or preferably overnight, until the bars are completely firm. This freezing time is essential for the bars to set properly, making them easy to slice.
- Once fully frozen, use the parchment paper overhang to lift the entire block of Chocolate Chip Cookie Ice Cream Bars out of the pan and onto a cutting board. Using a large, sharp knife (you might want to run it under hot water and wipe it dry between cuts for cleaner slices), slice the bars into your desired size. I usually cut them into 12-16 bars, depending on how generous I’m feeling!
- Serve immediately or wrap individual bars in plastic wrap and store them in an airtight container in the freezer for up to 2 weeks.
A Treat for Every Occasion
There you have it – a recipe for Chocolate Chip Cookie Ice Cream Bars that’s truly a game-changer for any home cook. This dessert isn’t just about combining two delicious things; it’s about creating a moment of pure, unadulterated happiness. From the comforting chew of the chocolate chip cookies to the refreshing coolness of the ice cream, every bite is a little celebration.
So, next time you’re looking for a dessert that’s both impressive and surprisingly simple, remember this recipe. Empower yourself in the kitchen and share the joy of these incredible homemade ice cream bars with your family and friends. Happy baking, and happy eating!
How to Make Perfect Golden Grahams S’mores Bars Every Single Time


