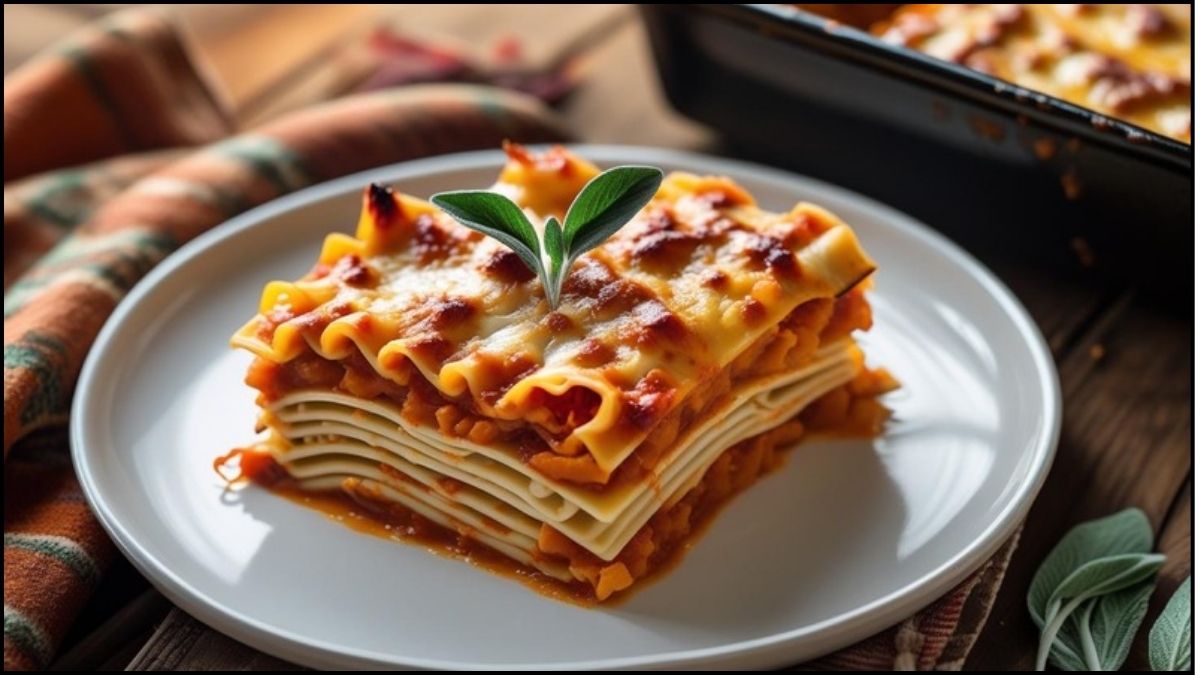
There’s a moment every fall when the air gets a little crisper, the sweaters come out of storage, and all I crave is comfort food. For years, my go-to be a classic meat lasagna, but I wanted something that truly celebrated the flavors of the season. That’s how this Butternut Squash Lasagna was born.
Imagine layers of tender pasta nestled between a velvety, sweet-and-savory butternut squash sauce, creamy ricotta filling, and nutty cheese, all tied together with the incredible aroma of sage brown butter. It sounds fancy, I know. But I’m going to walk you through every step, and you’ll see just how simple and rewarding it is to make. Let’s get cooking!
Quick Recipe
- Preparation Time: 40M
- Cooking Time: 1H40M
- Total Time: 2H20M
- Type of dish: Main Course
- Cuisine: Italian American
- Recipe Yield: 8-10 servings
- Calories: 650 kcal (approximately per serving)
Why This Recipe is a Keeper
| Key Takeaway | Why You’ll Love It |
|---|---|
| Incredible Flavor | Roasting the squash and browning the butter creates a deep, nutty, and slightly sweet flavor you just can’t get from a jar. |
| Surprisingly Light | This lasagna is rich and satisfying but doesn’t feel heavy, thanks to a squash-based sauce instead of a dense cream sauce. |
| Perfect for Guests | It’s an impressive vegetarian lasagna recipe that feels special enough for a holiday, but is easy enough for a Sunday dinner. |
| Make-Ahead Friendly | You can assemble it a day or two in advance, making it the perfect low-stress meal for entertaining. |
The Ingredients You’ll Need
Breaking down the ingredient list makes it feel much more manageable. Here’s what we’ll be using for each component.
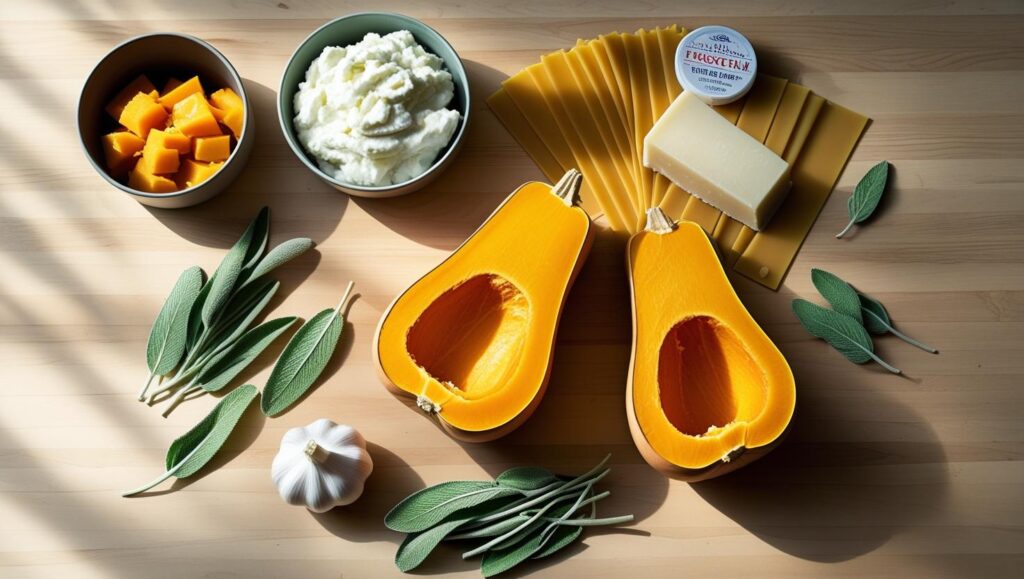
For the Creamy Butternut Squash Sauce:
- Butternut Squash: You’ll need one medium squash, about 2.5 to 3 pounds. This is our star player!
- Olive Oil: Just a couple of tablespoons for roasting the squash.
- Garlic: A few cloves to roast alongside the squash, which makes them sweet and mellow.
- Butter: We’ll use this to make a beautiful brown butter sauce. I prefer unsalted so we can control the seasoning.
- Fresh Sage Leaves: This is non-negotiable for that classic fall flavor! The aroma is incredible.
- Vegetable Broth: This helps create the perfect sauce consistency.
- Milk or Half-and-Half: Just a splash to give the sauce a silky, luxurious finish.
- Nutmeg: A pinch of freshly grated nutmeg is the secret weapon that enhances the squash’s natural sweetness.
For the Ricotta Filling & Assembly:
- Whole Milk Ricotta Cheese: Using whole milk ricotta makes the filling much creamier and less watery.
- Parmesan Cheese: Freshly grated, please! It makes a world of difference in flavor compared to the pre-shredded kind.
- Egg: This acts as a binder, helping the ricotta filling set so it doesn’t ooze out when you cut into the lasagna.
- No-Boil Lasagna Noodles: These are a huge timesaver and cook perfectly in the sauce.
- Low-Moisture Mozzarella Cheese: Buy it in a block and shred it yourself. It melts so much better than the pre-shredded kind, which is often coated in anti-caking powders.
- Salt & Black Pepper: For seasoning every layer.
Essential Kitchen Tools
- 9×13-inch Baking Dish
- Baking Sheet
- High-Speed Blender or Food Processor
- Large Skillet
- Mixing Bowls
- Spatula
Step-by-Step Guide to Perfect Butternut Squash Lasagna
I’ve broken this down into four main parts: making the sauce, mixing the filling, assembling, and baking. Follow along, and you’ll be golden.
Part 1: Create the Luscious Butternut Squash Sauce
This sauce is the heart of the dish. Roasting the squash first is the most important step for developing deep, sweet flavor.
- Prep and Roast the Squash: Preheat your oven to 400°F (200°C). Carefully cut the butternut squash in half lengthwise and scoop out the seeds. Place the halves cut-side-up on a baking sheet, drizzle with olive oil, and season with salt and pepper. Add a few unpeeled garlic cloves to the sheet. Roast for 40-50 minutes, or until the squash is fork-tender.
- Why we do this: Roasting caramelizes the natural sugars in the squash, making it intensely flavorful and sweet. Boiling would just make it watery and bland.
- Make the Sage Brown Butter: While the squash roasts, melt the butter in a skillet over medium heat. Add the whole sage leaves and cook, swirling the pan occasionally. The butter will foam, and then the milk solids will start to turn a toasty brown, smelling nutty and amazing. This takes about 3-5 minutes. Watch it carefully—it can go from brown to burnt quickly! Remove the crispy sage leaves and set them on a paper towel.
- Blend the Sauce: Once the squash is cool enough to handle, scoop the soft flesh away from the skin and add it to your blender. Squeeze the roasted garlic out of its peel and add it in. Pour in the brown butter (leaving the crispy sage for later), vegetable broth, a splash of milk, and a pinch of nutmeg. Blend until completely smooth and velvety. Taste and adjust with more salt and pepper if needed. You’ve just made a restaurant-quality creamy butternut squash sauce!

Part 2: Mix the Creamy Ricotta Filling
This is the quick and easy part. In a medium bowl, combine the ricotta cheese, half of the grated Parmesan, the egg, and a pinch of salt and pepper. Mix until it’s just combined. Don’t overmix!
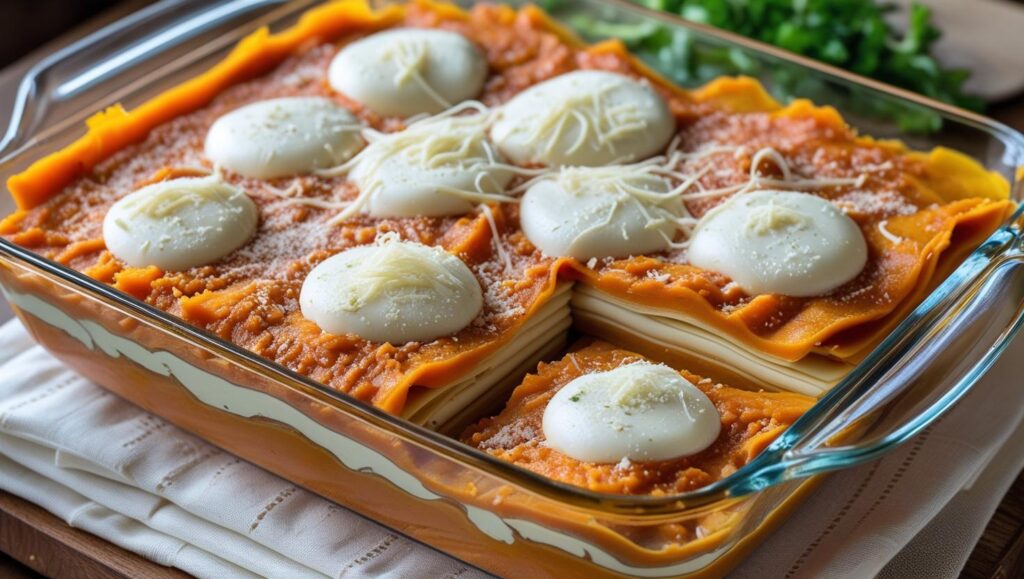
Part 3: Assemble Your Lasagna
Here’s where the magic happens. Think of it as building a delicious little house.
- First Layer: Spread about 1 cup of the butternut squash sauce on the bottom of your 9×13-inch baking dish.
- Why we do this: This first layer of sauce prevents the bottom noodles from sticking and helps them cook evenly.
- Build the Layers: Arrange a single layer of no-boil noodles over the sauce. Top with about half of the ricotta mixture, dotting it around with a spoon. Spread another cup of squash sauce over the ricotta. Sprinkle with one-third of the shredded mozzarella.
- Repeat: Add another layer of noodles, the remaining ricotta mixture, another cup of sauce, and another third of the mozzarella.
- Final Layer: Place the last layer of noodles on top. Spread the remaining butternut squash sauce over them, making sure to cover the noodles completely. Sprinkle with the rest of the mozzarella and the remaining Parmesan cheese.
Part 4: Bake to Bubbly Perfection
- First Bake (Covered): Cover the baking dish tightly with aluminum foil. Bake at 375°F (190°C) for 30 minutes.
- Why we do this: Baking it covered creates steam, which is essential for cooking the no-boil noodles through.
- Second Bake (Uncovered): Remove the foil and bake for another 20-25 minutes, or until the cheese is melted, bubbly, and beautifully golden brown on top.
- Rest is Best: This might be the hardest step! Let the lasagna rest for at least 15 minutes before cutting and serving. This allows the layers to set, so you get clean, beautiful slices instead of a sloppy mess. Garnish with the crispy sage leaves before serving.
Tips for a No-Fail Lasagna
- Don’t Skimp on Resting: I know it’s tempting to dig right in, but letting the lasagna rest is crucial for clean slices. I use this time to toss a simple green salad.
- Embrace the No-Boil Noodles: They really do work! Just make sure they are well-covered by sauce to ensure they soften properly.
- Make it Your Own: Feel free to stir some wilted spinach or kale into the ricotta mixture for extra greens.
A Dish to Be Proud Of
This Butternut Squash Lasagna is more than just a meal; it’s an experience. It’s the perfect dish to gather your family around the table for, a showstopper for a dinner party, and a comforting meal you’ll want to make all season long. I know you’ll feel so proud when you pull this bubbly, golden-brown beauty out of the oven. Enjoy every single bite.
 The Ultimate Filipino Fried Chicken Recipe for Crispy, Juicy Perfection
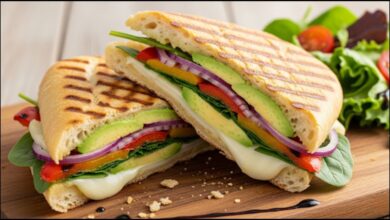 Unlock Flavor: How to Make the Perfect Avocado Veggie Panini Every Time
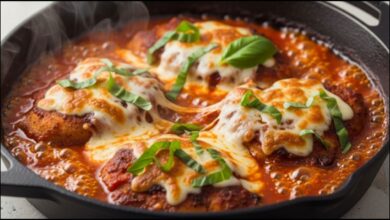 The Easiest Weeknight Chicken Pizzaiola Dish You’ll Ever Make
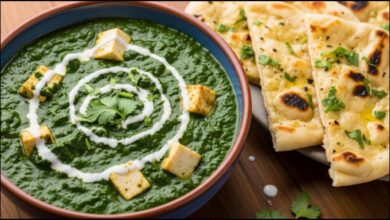 The Secret to a Perfectly Healthy Homemade Palak Paneer