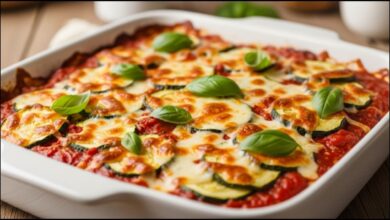
Your New Go-To Recipe Chocolate & Sweet Cream Marble Loaf
Master the art of baking with our easy-to-follow Chocolate & Sweet Cream Marble Loaf recipe. This stunning loaf features rich chocolate and delicate sweet cream swirled together for a moist, tender, and effortlessly elegant treat perfect for any home cook. Sources
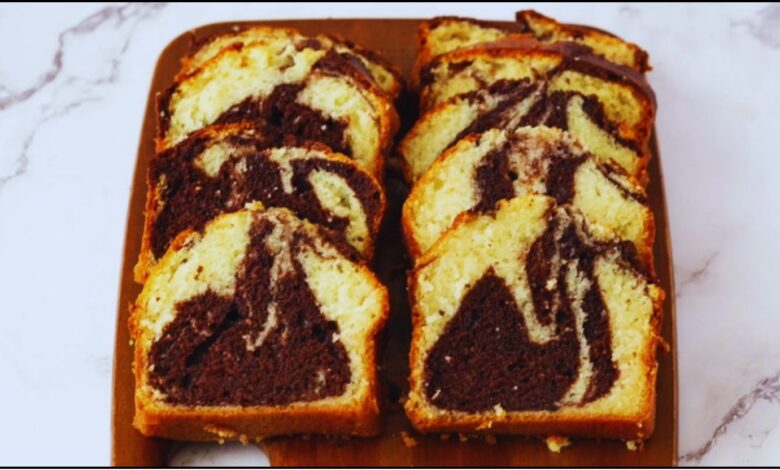
Ever found yourself craving something sweet, comforting, and just a little bit fancy, but without all the fuss? Maybe you’re hosting friends, looking for the perfect afternoon pick-me-up, or simply want to bake something beautiful to share with your family. I’ve been their countless times! That’s why I’m so excited to share my Chocolate & Sweet Cream Marble Loaf recipe with you. It’s a true gem – a moist, tender loaf swirled with rich chocolate and delicate sweet cream. It looks impressive, but I promise you, it’s incredibly simple to make, even if you’re new to baking. Get ready to bake a loaf that will have everyone asking for the recipe!
Quick Recipe
- Preparation Time: 20M
- Cooking Time: 55M
- Total Time: 1H15M
- Type of dish: Dessert, Loaf Cake, Quick Bread
- Cuisine: American
- Recipe Yield: 1 Loaf (approx. 10-12 slices)
- Calories: 280 calories (per slice, estimated)
Key Takeaways
- Effortlessly Elegant: Achieve a stunning marbled effect with minimal effort.
- Perfectly Balanced Flavor: Rich chocolate meets delicate sweet cream for a harmonious bite.
- Moist & Tender Crumb: Learn the secrets to a loaf that stays soft and delicious for days.
- Adaptable & Versatile: Easily customize with your favorite additions or enjoy plain.
Why This Chocolate & Sweet Cream Marble Loaf Will Be Your New Favorite
There’s something truly magical about a beautifully marbled loaf. It hints at complexity, yet the truth is, creating those mesmerizing swirls is much easier than it looks. This Chocolate & Sweet Cream Marble Loaf isn’t just about good looks, though. It’s about a perfect balance of flavors and textures. The deep, intense flavor of the chocolate batter beautifully complements the subtle sweetness of the vanilla-infused cream batter, resulting in a loaf that’s never too rich or too sweet.
The Secret to a Perfect Marble
The key to a stunning marble effect lies in not overmixing. You want distinct swirls, not a uniform brown batter. I’ll walk you through my simple technique for achieving this. Think of it like painting: you’re gently blending, not completely mixing. This gives you those beautiful contrasting streaks that make each slice a work of art.
Gather Your Tools: Essential Baking Equipment
Before we dive into the ingredients, let’s talk about the tools you’ll need. Having everything ready before you start, a concept called “mise en place” in professional kitchens, makes the baking process so much smoother and more enjoyable.
- 9×5-inch Loaf Pan: A light-colored metal pan is best for even baking. Darker pans can sometimes over-brown the crust.
- Mixing Bowls: At least two medium-sized bowls for your separate batters.
- Electric Mixer (Stand or Handheld): While you can use a whisk for some steps, an electric mixer makes creaming butter and sugar much easier and ensures a light, airy batter.
- Whisk: For dry ingredients.
- Rubber Spatula: Essential for scraping down bowls and folding in ingredients gently.
- Measuring Cups and Spoons: Accurate measurements are crucial in baking!
- Parchment Paper: Optional but highly recommended for easy removal and cleanup.
Ingredients You’ll Need
This recipe uses common pantry staples, so you likely have most of these on hand already! Always use room temperature ingredients when baking, especially butter and eggs. This helps them emulsify properly, creating a smooth, homogenous batter that traps air, leading to a lighter, more tender crumb.
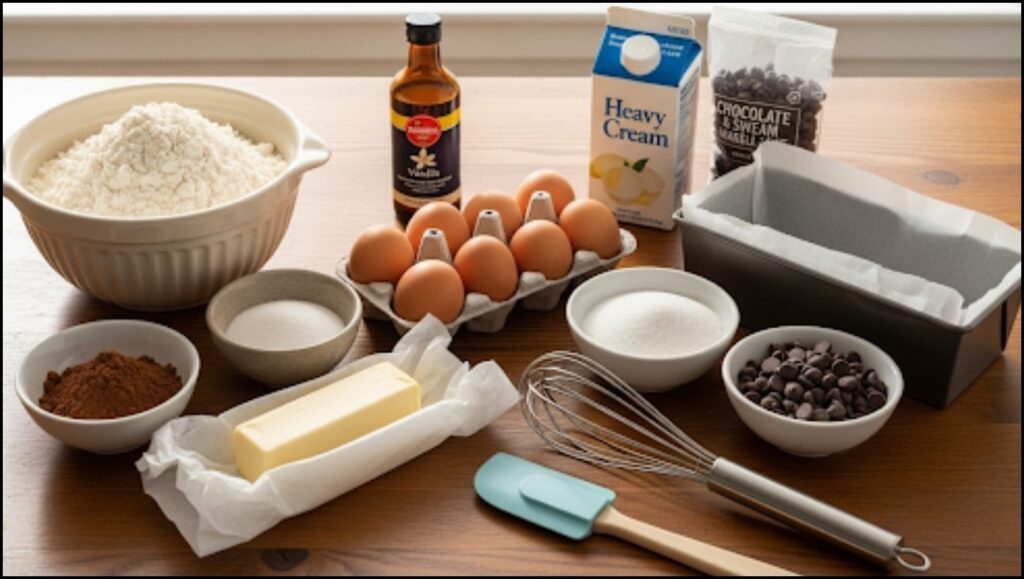
For the Sweet Cream Batter:
- 1 ½ cups (180g) All-Purpose Flour: Spoon and level your flour for accuracy. Don’t scoop directly from the bag, as this can compact the flour and lead to a dry loaf.
- 1 teaspoon Baking Powder: This is our primary leavening agent, giving the loaf its rise.
- ½ teaspoon Salt: Balances the sweetness and enhances the flavors.
- ½ cup (113g) Unsalted Butter, softened: Room temperature butter creams beautifully with sugar, creating a light and airy base.
- ¾ cup (150g) Granulated Sugar: Provides sweetness and contributes to the loaf’s tender texture.
- 2 Large Eggs, room temperature: Bind the ingredients together and add richness.
- 1 teaspoon Vanilla Extract: Use good quality vanilla for the best flavor.
- ½ cup (120ml) Milk, room temperature: Adds moisture and helps create a tender crumb.
For the Chocolate Swirl:
- ¼ cup (25g) Unsweetened Cocoa Powder: I prefer natural unsweetened cocoa powder for a classic chocolate flavor.
- 2 tablespoons Granulated Sugar: Just a touch more sweetness for the chocolate portion.
- ¼ cup (60ml) Hot Water or Coffee: Hot liquid helps “bloom” the cocoa powder, intensifying its chocolate flavor and ensuring it dissolves smoothly into the batter. Using hot coffee (even decaf) can surprisingly deepen the chocolate notes without tasting like coffee.
Step-by-Step Instructions: Baking Your Chocolate & Sweet Cream Marble Loaf
This is where the magic happens! Follow these steps carefully, and you’ll have a stunning Chocolate & Sweet Cream Marble Loaf ready to enjoy.
1. Prepare Your Pan and Oven
- Preheat your oven to 350°F (175°C).
- Grease and flour a 9×5-inch loaf pan, or line it with parchment paper, leaving an overhang on the long sides for easy lifting. This extra step guarantees your loaf won’t stick!
2. Prepare the Chocolate Mixture
- In a small bowl, whisk together the cocoa powder and 2 tablespoons granulated sugar.
- Pour in the hot water or coffee and whisk until completely smooth. Set aside to cool slightly. This step is crucial for unlocking the full flavor of the cocoa.
3. Cream Butter and Sugar
- In a large mixing bowl, using an electric mixer, beat the softened butter and ¾ cup granulated sugar together on medium speed until light and fluffy, about 3-5 minutes. This creaming process incorporates air, which is essential for a light and tender crumb. Scrape down the sides of the bowl as needed.
4. Add Eggs and Vanilla
- Beat in the eggs, one at a time, mixing well after each addition until fully incorporated.
- Stir in the vanilla extract. The batter might look a little curdled at this stage, but don’t worry, it will come together when you add the dry ingredients.
5. Alternate Dry and Wet Ingredients
- In a separate medium bowl, whisk together the flour, baking powder, and salt.
- With the mixer on low speed, gradually add the dry ingredients to the wet ingredients in three additions, alternating with the milk in two additions, beginning and ending with the dry ingredients.
- Start with flour (1/3 dry), mix until just combined.
- Add half the milk, mix until just combined.
- Add another third of the flour, mix until just combined.
- Add the remaining milk, mix until just combined.
- Finish with the last third of the flour, mixing just until no streaks of flour remain. Do not overmix! Overmixing develops the gluten in the flour, leading to a tough, dry loaf. A few small lumps are perfectly fine.
6. Create the Marble Effect
- Divide your sweet cream batter into two equal portions in separate bowls.
- To one portion, gently fold in the cooled chocolate mixture until just combined. Again, avoid overmixing; we want a distinct chocolate batter, not a muddy one.
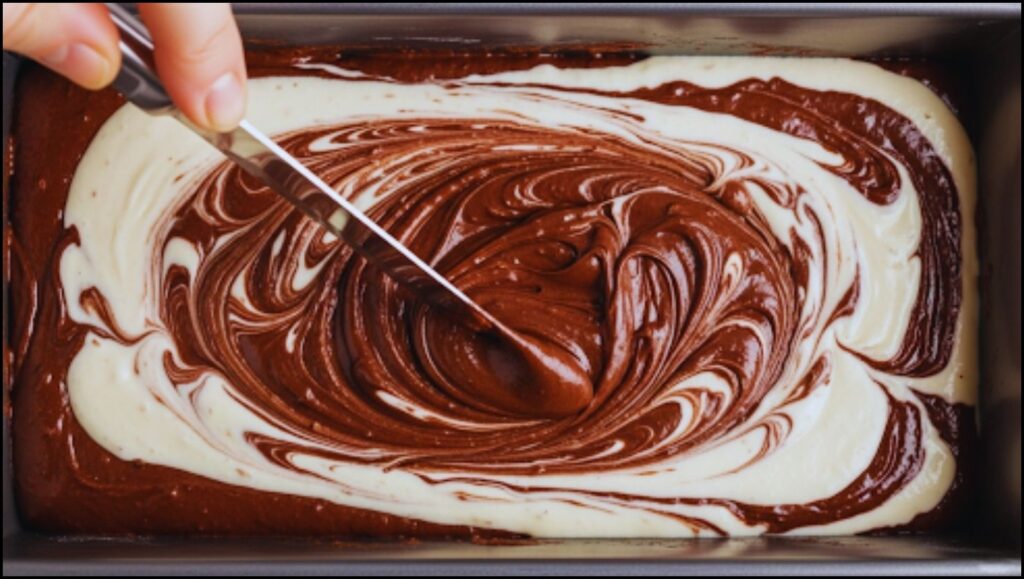
- Now for the marbling! Spoon alternating dollops of the sweet cream batter and the chocolate batter into your prepared loaf pan. Don’t worry about perfection here – variety makes it beautiful.
- Once all the batter is in the pan, take a butter knife or skewer and gently swirl it through the batters 1-2 times. Be careful not to overswirl, or you’ll lose that beautiful marble effect. My personal trick is to make S-shapes through the batter, gently lifting and folding it over itself.
7. Bake the Loaf
- Bake for 50-60 minutes, or until a wooden skewer or toothpick inserted into the center of the loaf comes out with only moist crumbs, not wet batter. If the top starts to brown too quickly, you can loosely tent it with aluminum foil.
- My oven tends to run a little hot, so I always start checking at the 50-minute mark. Every oven is different, so trust your judgment and the toothpick test!
8. Cool and Enjoy
- Once baked, remove the loaf from the oven and let it cool in the pan for 10-15 minutes. This allows the loaf to set and makes it easier to remove without breaking.
- Carefully lift the loaf out of the pan using the parchment paper overhang (if used) or invert it onto a wire rack.
- Let the loaf cool completely on the wire rack before slicing. I know, it’s tempting to cut into it warm, but cooling allows the crumb to fully set, resulting in a cleaner slice and better texture. Plus, the flavors develop more as it cools.
Tips for Success & Variations
- Don’t Overmix! I can’t stress this enough. Overmixing is the enemy of a tender loaf. Mix until just combined.
- Room Temperature Ingredients: This truly makes a difference in the texture of your loaf. Plan ahead!
- Storage: Store your Chocolate & Sweet Cream Marble Loaf at room temperature in an airtight container for up to 3-4 days. It stays wonderfully moist! You can also freeze slices for up to 3 months, thawing at room temperature when ready to enjoy.
- Additions: Feel free to fold in ½ cup of chocolate chips (mini or regular) into either batter for extra chocolatey goodness. A handful of chopped nuts like walnuts or pecans could also be a delicious addition to the sweet cream batter.
- Glaze It! For an extra touch, you could drizzle a simple vanilla or chocolate glaze over the cooled loaf.
- Simple Vanilla Glaze: Whisk together 1 cup powdered sugar, 2-3 tablespoons milk, and ½ teaspoon vanilla extract until smooth.
- Chocolate Ganache Drizzle: Heat ¼ cup heavy cream until simmering, pour over ¼ cup chopped chocolate, let sit for 5 minutes, then whisk until smooth.
Baking should be a joyful and rewarding experience, and this Chocolate & Sweet Cream Marble Loaf recipe is designed to bring just that to your kitchen. It’s a reliable recipe that delivers on both beauty and flavor, making it perfect for a casual snack, a special breakfast, or a lovely dessert. You’ve got this! Don’t be afraid to make it your own and enjoy the delicious process. Happy baking!
The Best Peanut Butter Oatmeal Chocolate Chip Cookies You’ll Ever Make


